Kubernetes(简称K8S) 是Google开源的分布式的容器管理平台,方便我们在服务器集群中管理我们容器化应用。
Zabbix快速配置使用
Zabbix的完整的监控配置的流程可以简单的描述为:Host Groups(主机组)=>Host(主机)=>Applications(监控项组)=>Items(监控项)=>Trggers(触发器)=>Event(事件)=>Actions(处理动作)=>User groups(用户组)=>User(用户)=>edias(告警方式)=>Audit(日志审计)
Zabbix-agent客户端的安装和使用
Zabbix总体使用的Agent/server的架构,客户端的采集方式分为 Agent ,SNMP等。
这篇文章我们来学习使用agent方式对服务器监控
Zabbix 5 安装部署
zabbix是一个基于WEB界面的提供分布式系统监视以及网络监视功能的企业级的开源解决方案。能监视各种网络参数,保证服务器系统的安全运营;并提供灵活的通知机制以让系统管理员快速定位/解决存在的各种问题。
Mac 升级 catalina 后无法创建文件,Read-only file system
问题解决:mac升级之前只要获得权限后就可以在几乎任何目录下新建和删除文件。但是当mac升级到最新的版本catalina后,当在根目录或者其他系统目录下进行文件修改就会提示:Read-only file system
Docker 入门介绍
如果你还不知道 docker 是什么是不是有点out了,接下来我们来介绍docker是什么,解决了什么问题,好处在哪里。
centos7.* 安装 mysql 7
centos7.* 安装 mysql 7的方法
Hyper-V虚拟机配置内部网络固定IP并连接外网
Hyper-V中的虚拟机CentOS7能固定IP并且连接外网
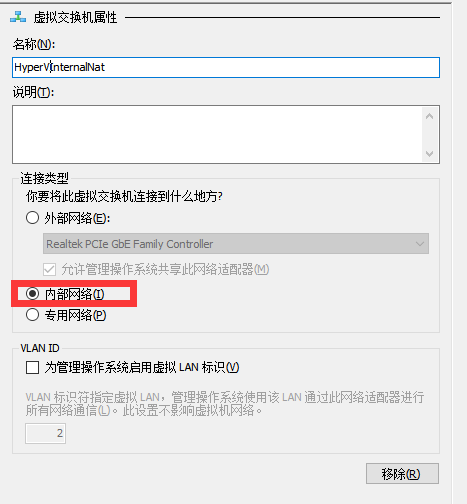
新建内部网络虚拟交换机
修改虚拟网卡IP地址
经过第一步后,网络连接中会出现刚刚新建的虚拟网卡”HyperVInternalNat”
打开 控制面板-网络和Internet-网络连接
找到刚刚新建出来的虚拟网卡
右击该网卡,属性-网络-Internet协议版本4(TCP/IPv4)
填写固定IP地址,我这里填写的是192.168.137.1,子网掩码255.255.255.0
备注:192.168.137.1这个IP地址恰巧也是Windows网络适配器共享网络所使用的默认IP地址(注册表可修改)
应用到虚拟机的网卡上
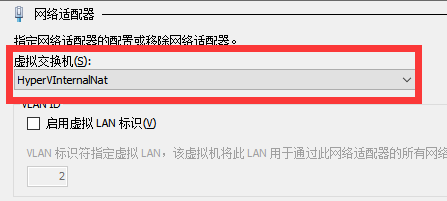
修改虚拟机网络设置
定位到network-scripts目录,找到并编辑自己的网卡(一般叫ifcfg-eth0)
1 | cd /etc/sysconfig/network-scripts/ |
1 | #dhcp动态获取改为static静态IP |
重启网络服务
1 | sudo service network restart |
可以看到修改的配置已经生效
到这一步为止,虚拟机已经使用HyperVInternalNat网卡(192.168.137.1)设置了自己的IP(192.168.137.10)
在宿主机上,使用 ping 192.168.137.10,发现能ping通
解决ssh连接虚拟机慢的问题
网络上找到的教程大多数到此为止,但是我自己在实际尝试过程中还发现别的问题:
使用Xshell连接虚拟机,建立连接的过程很慢,大概需要等待半分钟至一分钟左右
让我一度以为我没配置成功或者配置出错或者防火墙阻碍了连接,但是连上之后输入命令一切正常
经搜索后发现,可能是由于虚拟机ssh尝试反向解析客户端的IP地址,如果DNS中没有这个IP的域名解析,则会等到DNS查询超时才会进行下一步,消耗很长时间。
解决办法如下:
继续在虚拟机中
sudo vi /etc/ssh/sshd_config
将 #UseDNS yes 改成 UseDNS no(注意去掉#符号),修改后如下图所示(文件内容有些长,找不到这句话可以使用/UseDNS进行搜索)
保存修改后,重启sshd
sudo service sshd restart
重新使用Xshell连接虚拟机,发现连接速度正常了
此时宿主机能随时随地使用192.168.137.10连接虚拟机,但是虚拟机是无法访问到外网
内部网络-虚拟机访问外网#
1.打开 控制面板-网络和Internet-网络连接
2.找到宿主机正常联网使用的网卡
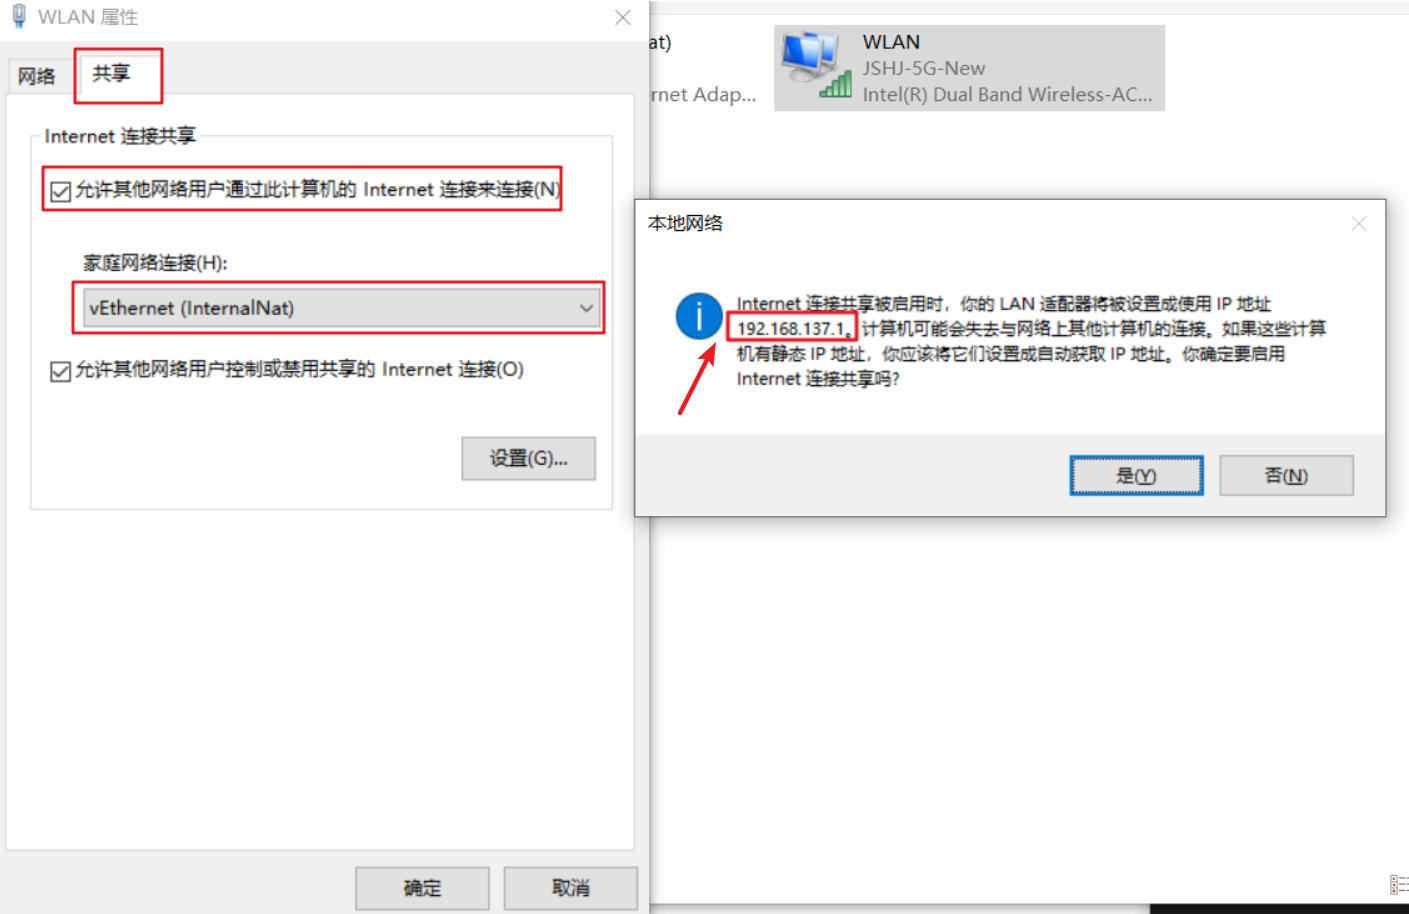
3.右击该网卡,属性-共享
4.勾选“允许其他网络用户通过此计算机的Internet连接来连接”,然后下拉菜单中选择新建出来的HyperVInternalNat虚拟网卡
5.确定的时候会提示虚拟网卡的IP地址将被设置成192.168.137.1,这个就是前文提到的他是默认的共享网络IP地址,由于之前我本身就设置的137,所以此处点我们不再需要做任何修改
(如果不想用137网段,需要修改注册表默认的共享网络IP地址)
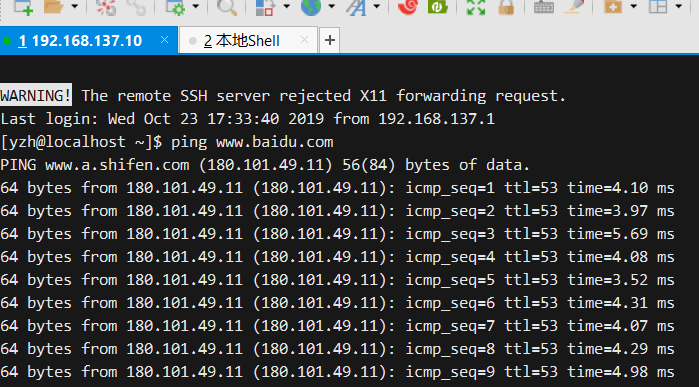
点击“是”后,会短暂失去连接,重新使用Xshell连接虚拟机,此时虚拟机已经可以连接外网
到这里,Hyper-V虚拟机配置内部网络固定IP地址,并且能够连接外网
(更换了网络环境,例如无线网络连接切换WiFi,虚拟机就连不上网了,需要重新再设置一下)
参考:
centos pptpd安装配置
1 | yum install -y ppp wget net-tools perl |
参考: